This is a little side project i have been working on. Its a little guitar its a mock up almost. I made it in a matter of minutes mostly by sketching on the shapes. I plan to create a new one through assembly, making part by part and then creating a better more attractive guitar
Wednesday, June 15, 2011
Sunday, June 12, 2011
IDWs
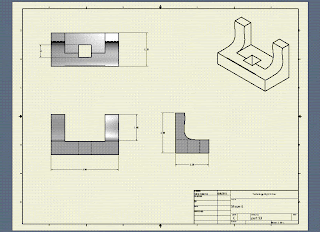
These are The Idws i created on inventor. The goal was to create 6 Shapes on inventor and then charge there formats to Idw instead of Ipt. The transitions went pretty smoothly until i realized that some of my shapes were created upside down. So from this i had to change the views with the help of my engineering teacher so that the views matched the views that they corresponded with.

Tuesday, May 17, 2011
Parametric Constraints
This is a image of a plate created on inventor. But the only diffrence between this and any other thing done is that it was not made by using numbers like 1,2,3 we used equations to create the dimension of this plate. Each dimension was givin a number. Example the length was called d0 the width was d1. We imput equatons instead of numbers like d3= d2-d1.
Tuesday, April 12, 2011
Sketches
These are some quick sketches i created in my engineering note book.These shapes were fun to create because of the 3-D perspective i had to draw it in.
One Point,Two Point,Three Point Perspective Sketching
This is what is called one point, two point and three point perspective sketching. They are created by drawing a line with dots on the line, one point uses one dot, two point uses 3 and so on, and they all consist of an Vanishing Point. I learned to recognize the sketch by the way it is constructed.
Basic Assembly Constrants
This is a little project that we had to work on. It was to make sure that we could create a shape using all of Inventors features. It also tested how well we could fallow directions.
Monday, April 11, 2011
Driving Constraints
This is one of the coolest ways to use inventor. With the pre created parts and construct this device. This device would make the green part move from right to left and as i would move the blue bolt would make the red part move up and down.
Sunday, April 10, 2011
Inventor Images
In order to use Inventor to its full potential, we had to learn how to work all of Inventors features.Our Engennering Teacher gave us a list of projects to work on and instuctions on how to compleate them each using a different inventor feature. My favorite one was creating a wrist band because there was a problem with the pre created sketch so i had to create it from scratch. Here are some examples of the thongs I`ve created.
Thursday, March 3, 2011
 This the inventor version of my cube. I had to create each shape before i put together the actual cube i had to create each puzzle piece separately before i put the whole cube together. That was the easy part. The hard part was putting the cube together. I came upon many situations where i was not able to put because the parts were uneven. I had to repeat the first step a few times before i finally got it right.
 Monday, January 31, 2011
Cube Project
For this project we were made to draw a set of shapes. The shapes had to consiste of 3 4 5 and 6 cubes. After we were done coming up with the combinations, we had the fun but challenging task of makeing a 3x3x3 cube only using 3 cubes.
After a long and challenging day i came up with my cube. (As Shown in first picture). Then using plastic cubes peices we created our 3x3x3 cube.
Our next task was to create a packaging for our cube. It was alot of fun i really got to become real creative with mine.(bottom left)
After a long and challenging day i came up with my cube. (As Shown in first picture). Then using plastic cubes peices we created our 3x3x3 cube.
Our next task was to create a packaging for our cube. It was alot of fun i really got to become real creative with mine.(bottom left)
Cup Project
Me and my partner Dentston decided that most people would enjoy a cup that is compleatly spill proof. That is how we invented "The Spill Proof Cup". Our cup guarantees that your drink will not spill. It comes compleate with handle bar, rubber bottom, Groves and a lid with sraw.
The project was alot of fun and i learned alot on how objects change as the need to help fit the need of the customers.
Thursday, January 27, 2011
Welcome
Hi! My name is John Colocho and i will be useing this blog as a porrtfolio for my Introduction To Engineering Design class. I will be posting my projects and examples along with a brief discription of what i did. Please check back to see my work!
Subscribe to:
Posts (Atom)


